

1What you need
An Android phone, the app, and an SSIRL Cloud subscription. There is no fourth thing. No capture card, no laptop left running at home, no encoder box, no rented relay, and no addresses to copy anywhere.
The subscription is £50 a month and you start it at my.ssirl.com. One price covers all of it: the app, the servers that take your stream, your overlays, and sending it on to Twitch or wherever you stream. Nothing is charged by the hour or by the gigabyte.
The app is tested on cheap hardware. A phone costing around fifty pounds will stream. A newer one copes better with the sharpest setting, but that is not the difference between going live and not going live.
2Sign in
Open the app and you land on the sign-in screen. Type your email and password, or tap Create an account if you have not got one yet. Signing up sends you an email: open the link in it, then come back to the app and sign in.
Forgot password? sends a short code to your email. You type that code into the app and set a new password there.
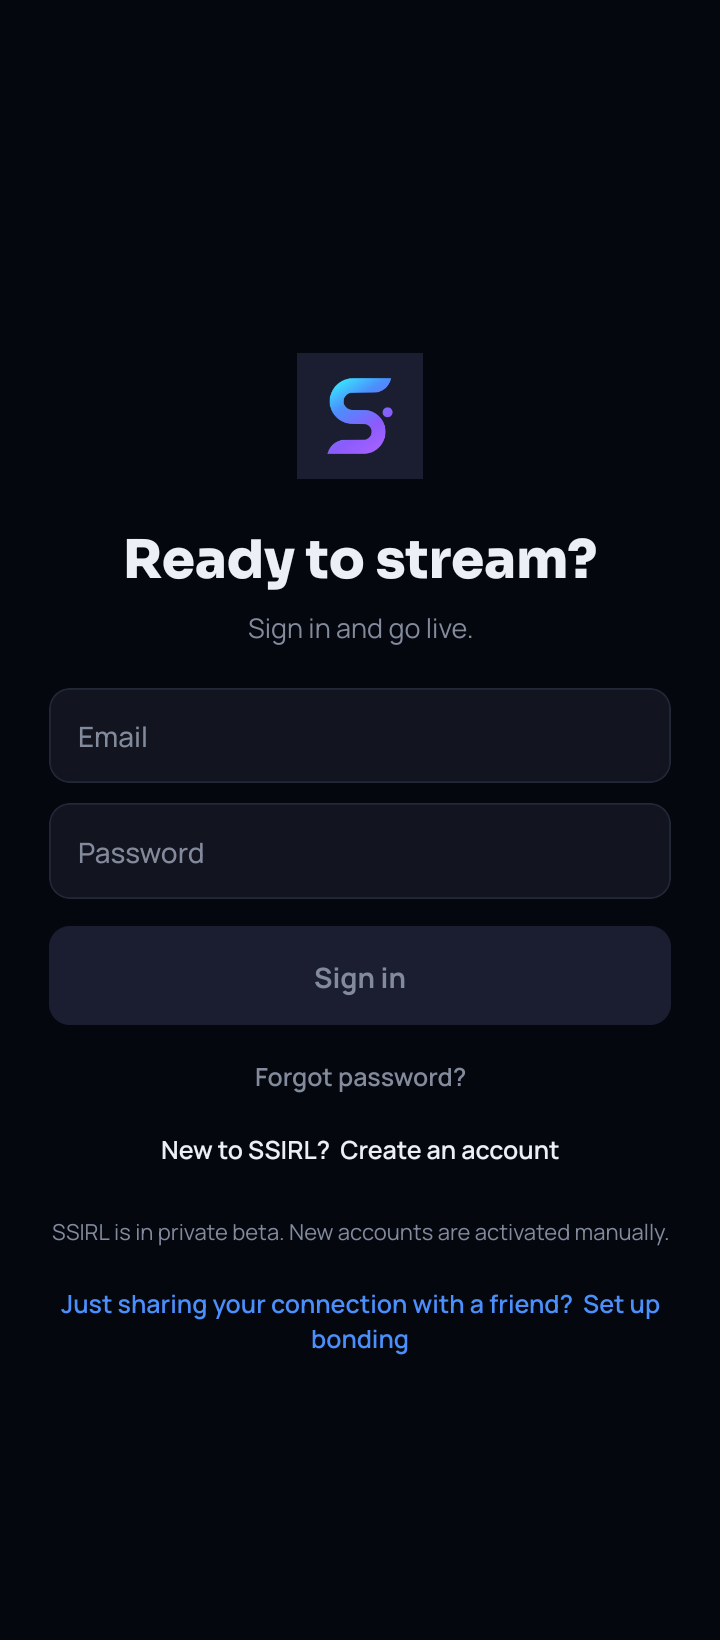
That last blue line is for somebody who is not streaming at all. If a friend is only lending you their phone signal, that is where they go, and they never need an account. See lend your signal to a friend.
3Your subscription
Swipe in from the right edge of the camera screen to open the menu, then tap Account. It tells you which email you are signed in as, which plan you are on, and whether your access is working, along with the date it renews or runs out.
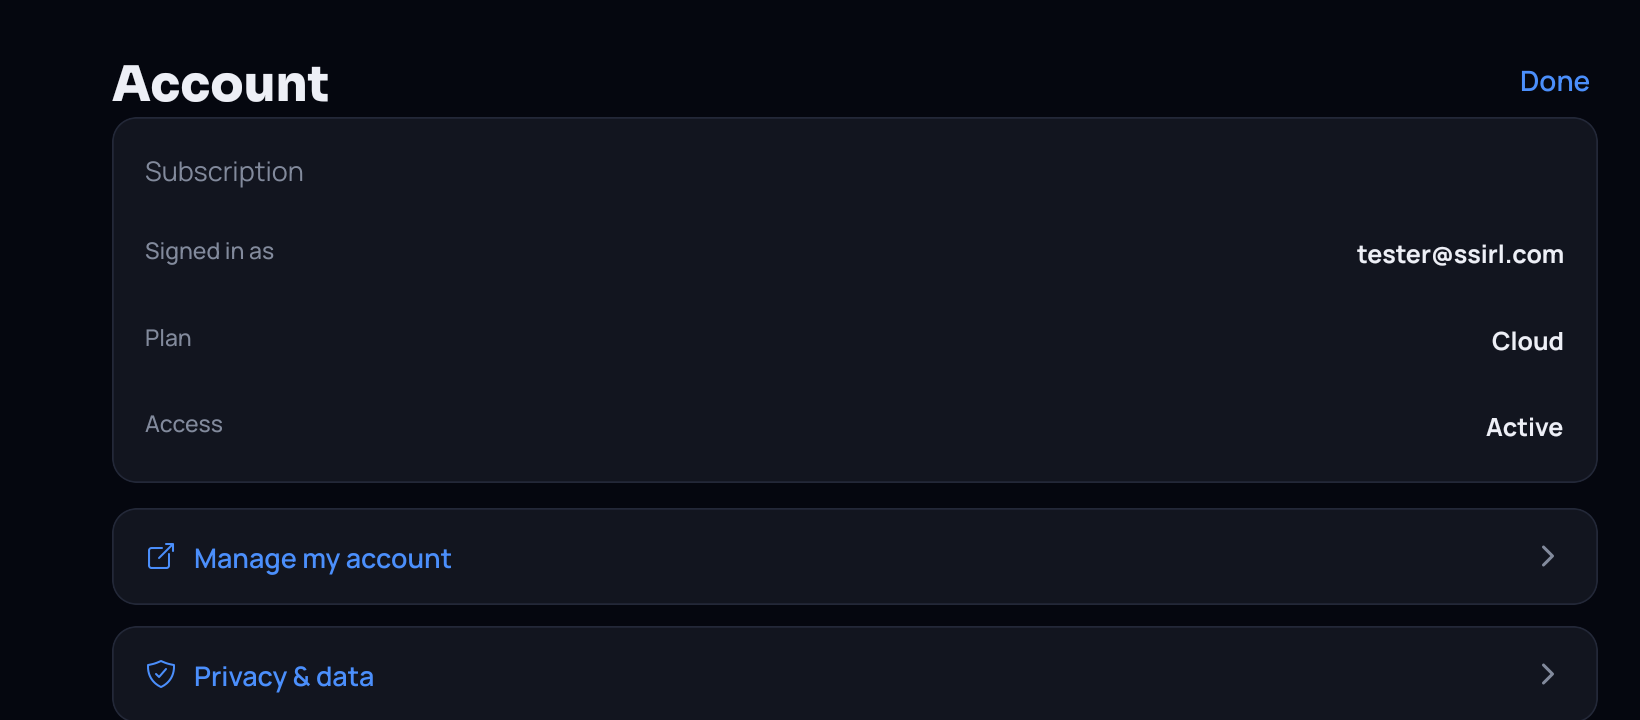
Manage my account opens my.ssirl.com in your browser, which is where you change your subscription, add places to stream to, and design what your viewers see. Privacy & data is where you turn analytics off, and where you send us a report if something has gone wrong and you want us to look at it.
4Where you go live
A destination is somewhere you stream to: your Twitch channel, your YouTube channel, and so on. You set these up once in a web browser, and after that you just pick one each time you go live. Sign in at my.ssirl.com and find Where you go live.
Add a destination
Press Add a destination and choose your platform.Sign in with the platform, if you can
For Twitch, Sign in with Twitch is the better route. It keeps itself connected, and it lets the app set your stream title and category for you as you go live. You never see a stream key at all.Otherwise paste a stream key
Every other platform asks for a name and a stream key, which you copy from that platform's own settings. Keys are scrambled when you save them and are never shown again.
You can keep up to three destinations. Two of them can be two different Twitch accounts, so a shared channel and your own can both live here.
5What your viewers see
Your viewers do not see the raw camera picture. They see a layout we build for you on our own machines: your camera, plus anything you have put on top of it. Pictures, text, and live readouts like a map, your speed, the weather where you are, your phone battery and your chat. One of those layouts is called a scene.
At my.ssirl.com, open Scenes and press Launch Editor. It works like OBS, but in a browser. Two scenes are made for you already:
- Live, which is your camera. This is what goes out normally.
- Connection Lost, which is what viewers see if your signal goes. We switch to it for you. Most people put a still picture and a line of text on it.
You can change a scene while you are live. Move something in the browser and it moves on the stream. Nothing stops, and nobody has to rejoin.
6The main screen
The app opens straight into the camera, held sideways, ready to go. There is no setup to work through first and no address to type in anywhere.
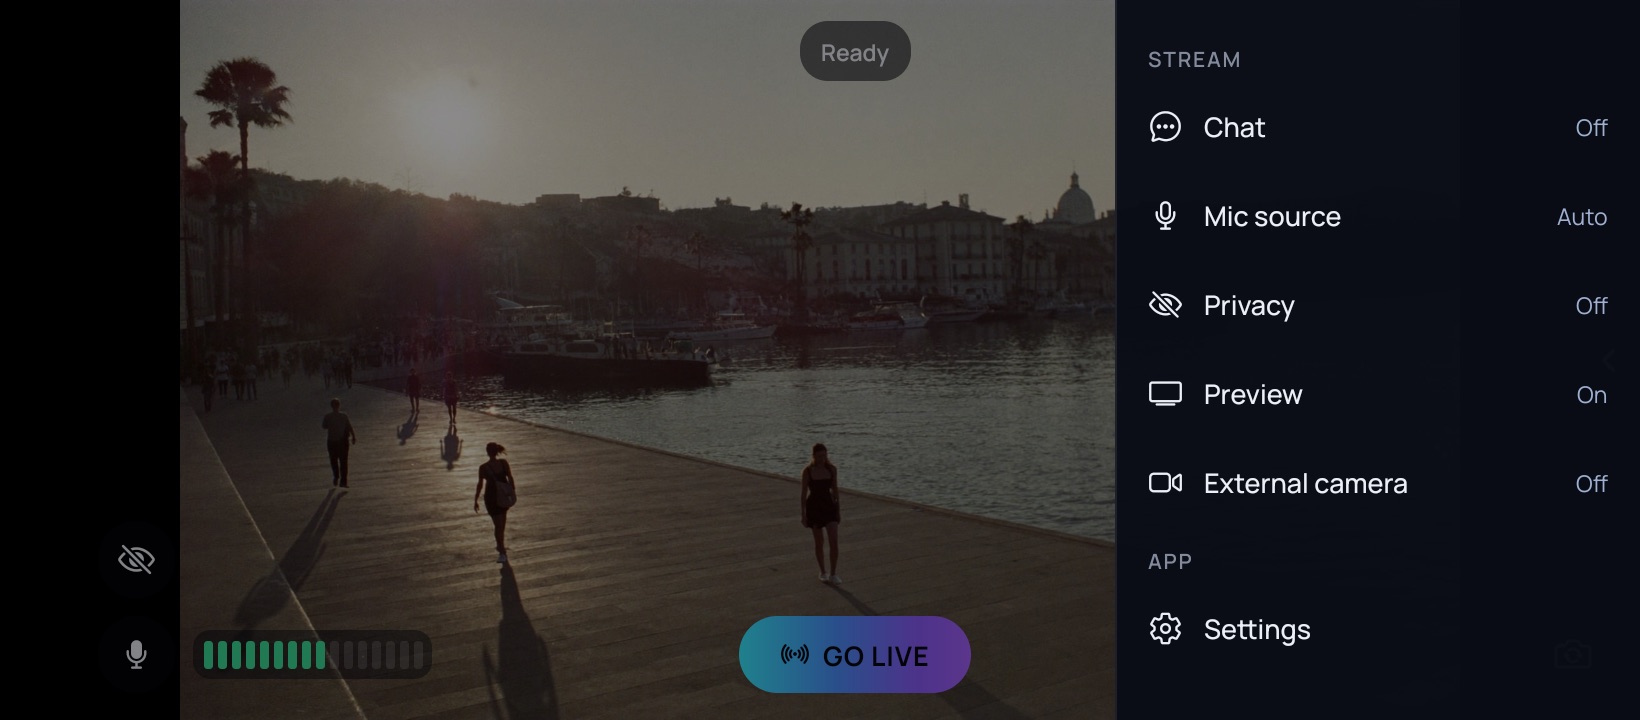
Five things to find, and then you know the screen:
- Top centre is the status. It says Ready before you start, and Reconnecting if the stream is struggling to come back.
- Bottom centre is GO LIVE. It becomes a red STOP once you are streaming.
- Bottom left is the privacy button, the mute button, and the bar that shows how loud you are.
- Bottom right switches camera.
- The right edge opens the menu. Swipe in from it, or tap the small arrow tab halfway down.
The menu is one list in two halves. Stream holds the things that change your broadcast: Chat, Mic source, Privacy, Preview and External camera, each with its current setting shown on the right. App holds Settings, Account and Bonding device.
Once you are live, a row of small labels appears along the top, one for each internet connection you are using, showing how much of your video each one is carrying.
7Cameras and lenses
The button at the bottom right opens the camera list: Front camera, Back camera, and Wireless external cam once one is connected.
If your phone has more than one lens on the back, a Lens row appears underneath with the wide and the zoomed ones in it. You start on the front camera, because most people begin by talking to their chat.
8Your microphone
The bar next to the mute button is the only sound check you need. Talk at your phone and watch it. It should move well along the bar without sitting jammed at the far end. Sound is the thing viewers put up with least, so it is worth ten seconds here.
The mute button switches your microphone off. To use a different microphone, open the menu and tap Mic source. Auto lets the phone choose, or you can pick one yourself, including a plugged-in or Bluetooth microphone.
If you switch to a wireless camera, the app switches to that camera's own microphone too and tells you it has done so. Mic source is where you change it back.
9Chat on your screen
Open the menu and tap Chat to put your Twitch chat on top of the picture, so you can read it and reply without pulling out a second phone.
Tapping Chat turns it on and off. The first time you turn it on, it asks which channel to read. To change the channel later, press and hold that same row.
If you are streaming to a Twitch account you connected by signing in at my.ssirl.com, chat switches itself on when you go live with the right channel already filled in, and you never touch this at all.
10The privacy button
The eye button at the bottom left is the emergency one. Press it once and your viewers get a black screen and your microphone goes silent, both at the same moment. Press it again to come back. The same switch is in the menu, called Privacy.
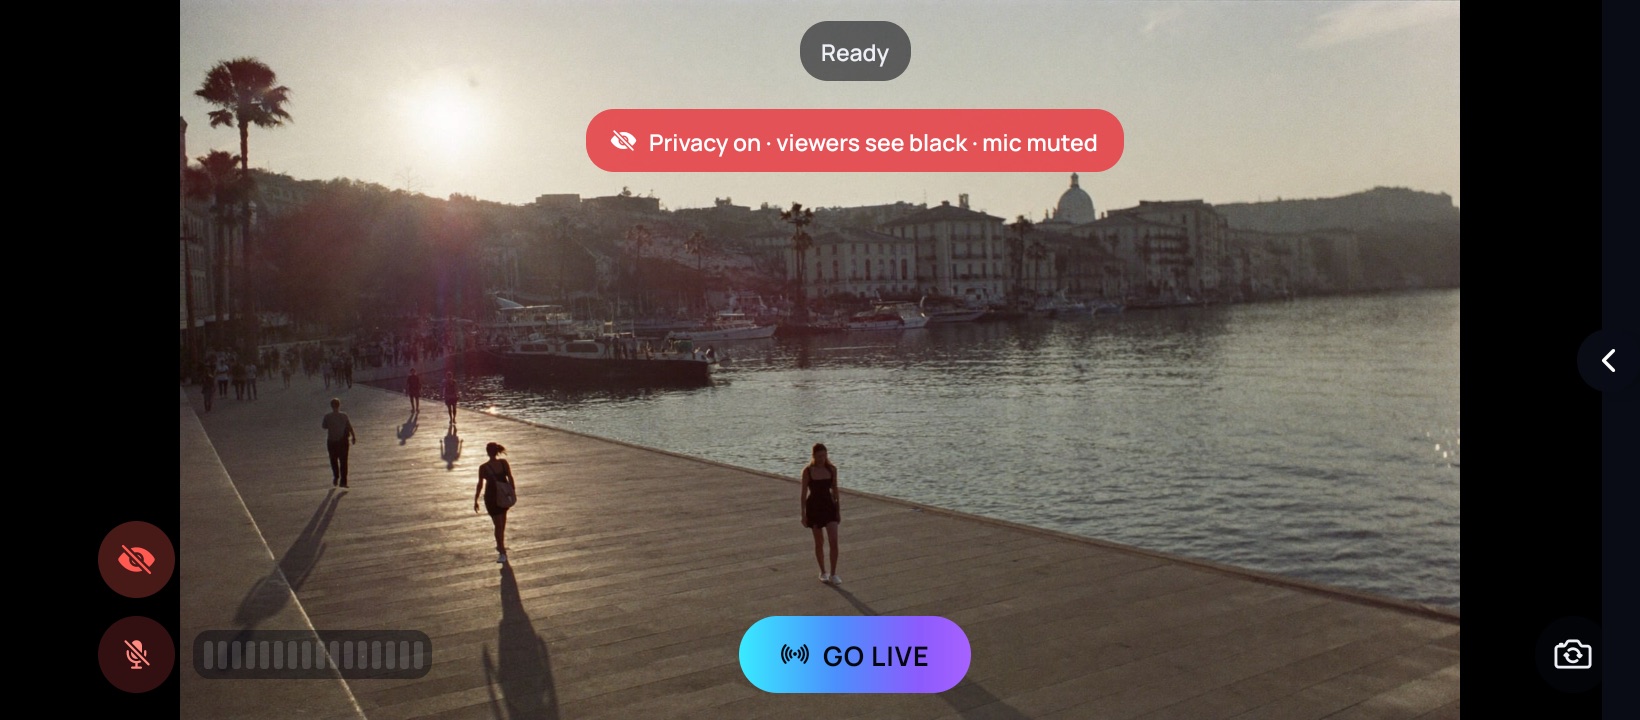
There is a second, calmer version of this message. If the scene going out at that moment does not include your camera anyway, the app says so in a quieter colour. Nothing is broken and nothing is leaking; your camera is simply not the thing on screen right then.
11Saving battery
Open the menu, tap Preview, and set it to Off. Your phone stops drawing the picture on its own screen. The stream carries on exactly as it was and your viewers see no difference at all. On a long walk this is worth real battery and a cooler phone. Turn it back on any time you want to check what you are filming.
12Wireless action cameras
A GoPro or a DJI can go out through the app instead of your phone camera. We pass its picture straight through without squeezing it a second time, so nothing is lost on the way.
Tell the app to listen
Open the menu and tap External camera. The app shows you an address starting withrtmp://.Put that address into the camera
Paste it into your camera's own live streaming settings. Some cameras call this the RTMP URL and some just call it live streaming. Both devices have to be on the same Wi-Fi, because that address points at your phone on that network.Start using it
Once the camera connects, choose it with the camera button at the bottom right. Its sound comes with it.
If the camera drops out while it is the one going out, the app switches back to your phone camera by itself and tells you it has. Your stream keeps running.
13Simple mode
Open the menu and tap Settings. The first thing on it is Mode, and Simple is where you should start. For most people it is also where they should stay.
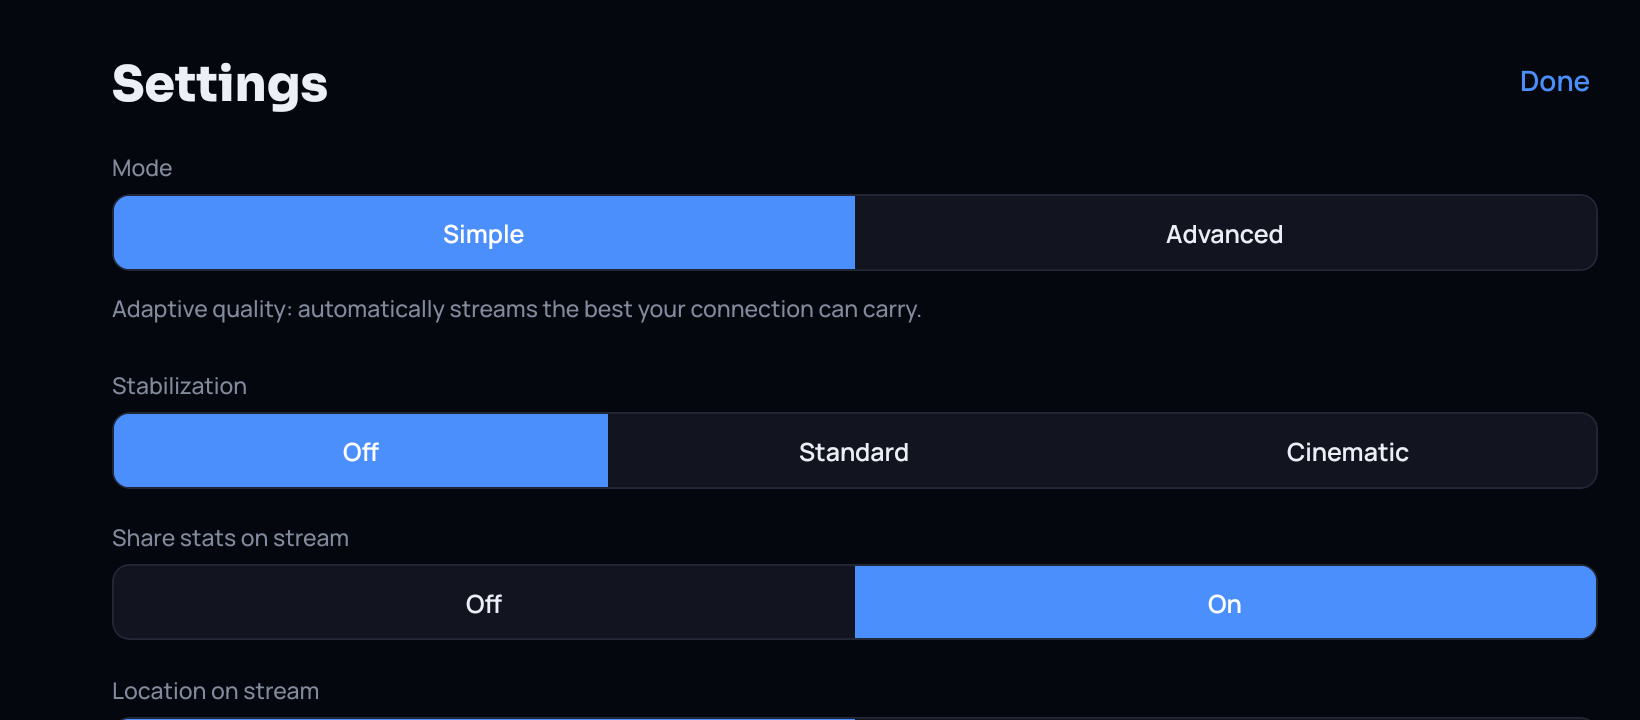
Simple decides your picture quality for you, and keeps deciding it. As your signal gets better or worse it sends more or less, so you are always sending the best your connection will genuinely carry rather than a fixed amount it cannot.
Stabilization is the one choice worth making here. Off adds no delay at all. Standard smooths out your walking. Cinematic is the smoothest, but to manage it the phone holds about a second of video back before sending, and that second is added to the gap between you and your chat. For walking and talking, Standard is usually the right trade.
14Advanced mode
Advanced puts the controls back in your hands. Nothing here needs touching, and the standard settings were worked out outdoors on real phones, so go in with a reason rather than out of curiosity.
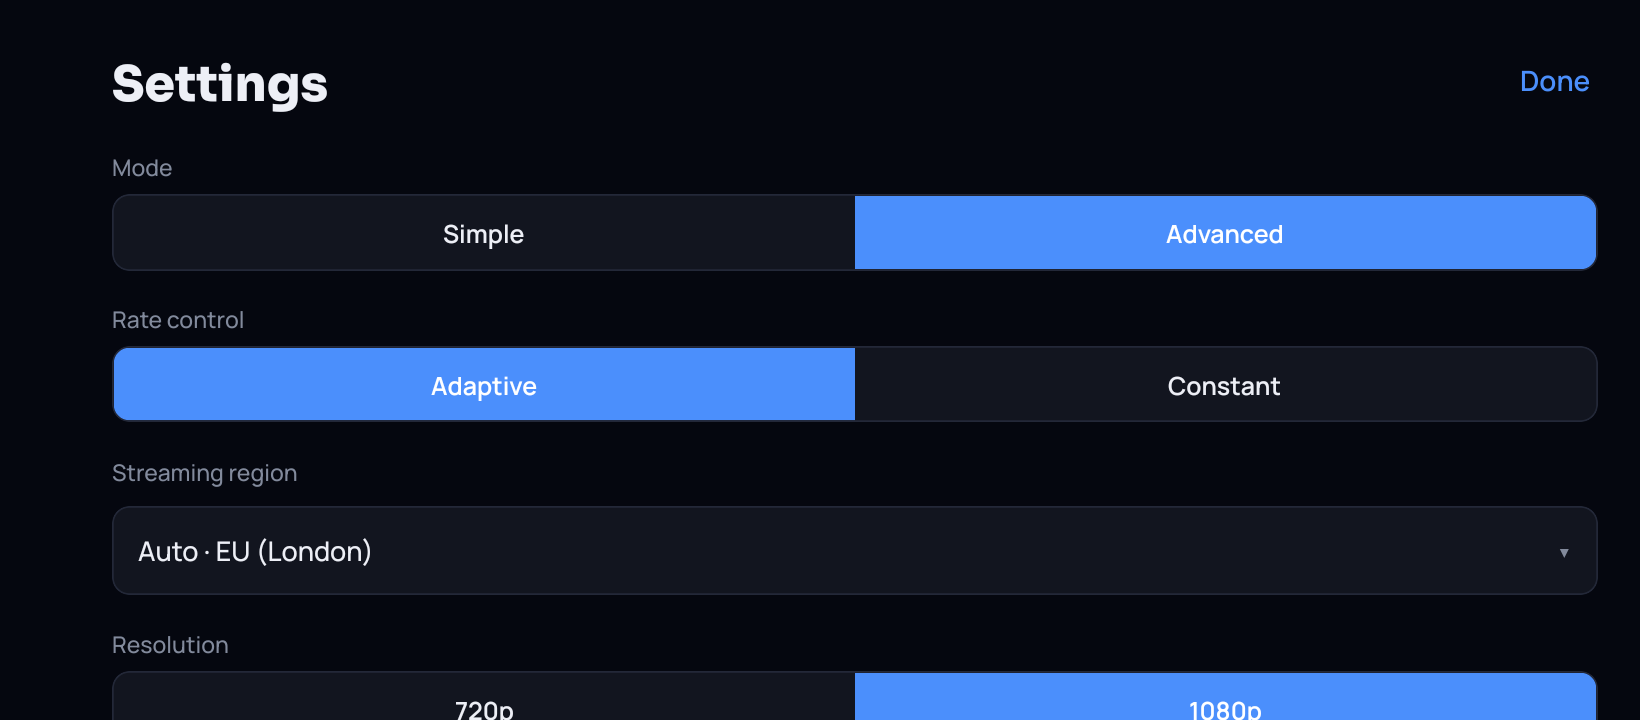
- Rate control. Adaptive is what Simple does, letting quality move with your signal. Constant holds it at one figure and adds a slider to set that figure. Only worth it on a connection you already trust.
- Streaming region. Which of our servers takes your stream. Auto tests them and picks the quickest. Choose one yourself if you know better.
- Resolution and Frame rate. How sharp, and how smooth. 1080p and 30 to begin with. 60 looks smoother but needs roughly twice as much data to stay clean.
- MTU and Codec. Leave MTU alone unless a particular network misbehaves. Codec is how the video is squeezed: H.265 is the default and looks better for the same amount of data, and H.264 is the older, safer one if a platform is fussy.
There is no delay setting. It is fixed at two and a half seconds, which is where our own testing on real mobile networks kept landing.
15Stats and location on stream
Share stats on stream is what feeds the live readouts in your scenes: the map, your speed, your phone battery, and the weather where you actually are. With it off, those have nothing to show.
With it on, Location on stream decides how precise you are. Approximate moves your position by up to 250 metres, so viewers can follow roughly where you are going without being able to find your exact spot. Exact is exact.
Either way it is only shared while you are live, and it is deleted when you stop. Both switches work mid-stream, so you can turn location off for one street and back on afterwards.
16Add another phone
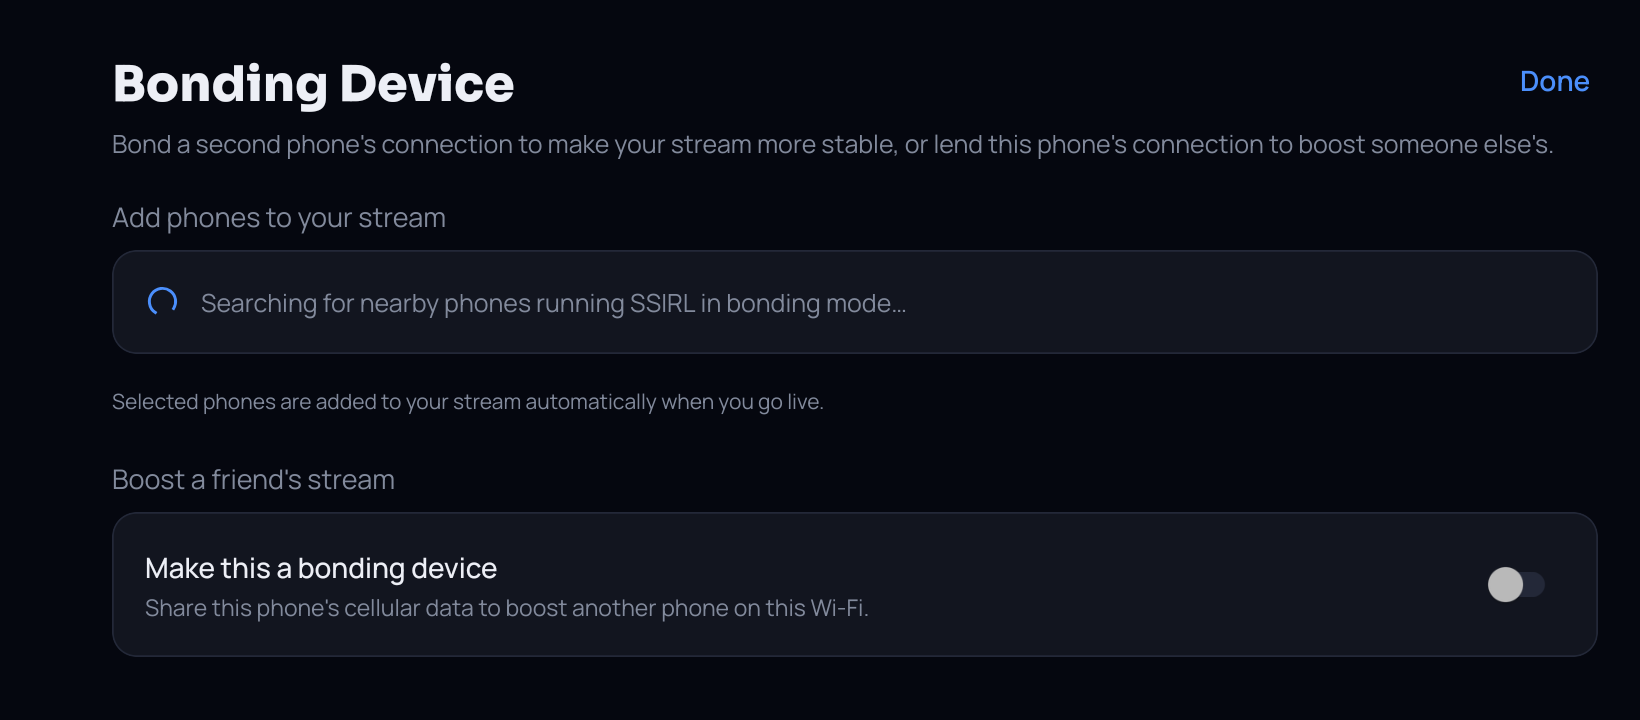
Bonding means using more than one internet connection at the same time, so that if one struggles the others carry your stream. Your phone already does this with its own mobile data and its Wi-Fi together. What it cannot do is use two SIMs at once, so a second mobile network means a second phone. Any phone with the app can lend you one.
Put both phones on the same Wi-Fi
A hotspot from one of them is fine. This is only so they can find each other. Your stream still travels out over each phone's own mobile connection.Open Bonding device on your phone
Open the menu and tap Bonding device. Under Add phones to your stream, it looks for nearby phones that are offering.Choose the ones you want
The phones you pick join your stream automatically every time you go live. You do not have to set this up again.
None of this needs configuring. The app uses whatever it can reach, which is also why a stream that starts on your home Wi-Fi survives the walk out of the front door.
17Lend your signal to a friend
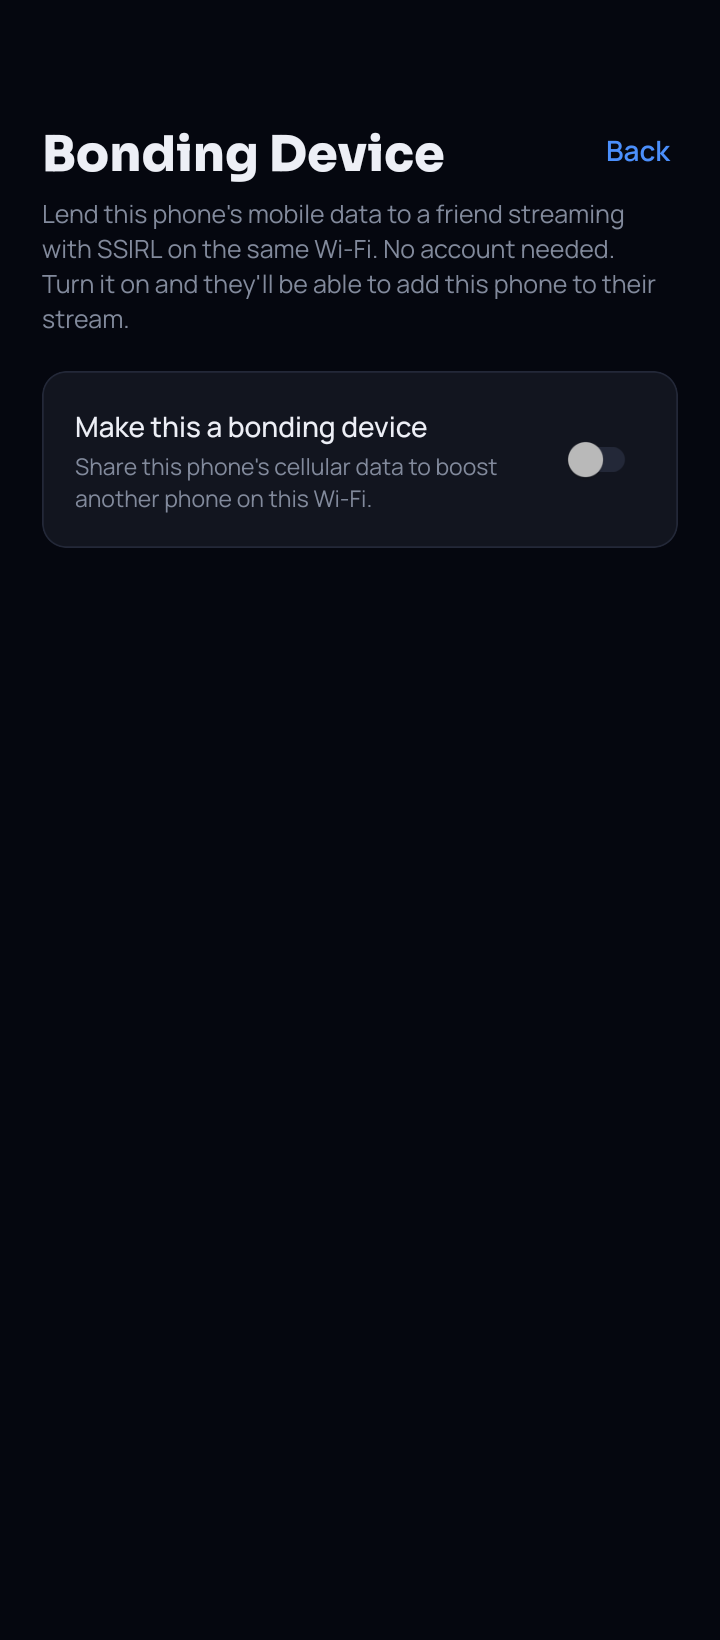
This is the part your friend does, and it takes about twenty seconds. They need the app and mobile data. They do not need an account, a subscription, or any idea what any of this is.
Install the app
From the Play Store, same as you.Tap the blue line on the sign-in screen
Just sharing your connection with a friend? Set up bonding, at the bottom. No signing in and no signing up.Turn the switch on
Make this a bonding device. Their phone needs working mobile data to be any help, and it needs to be on the same Wi-Fi as yours.
They never see your stream. Their phone passes the data along without ever opening it. Add as many friends as you can talk into it.
18Going live
Press GO LIVE. The app asks you up to three quick things, then you are on.
Where to stream
Your destinations from my.ssirl.com, each with its platform's mark beside it.Which scene to start on
Only asked if you have made more than one scene. You can change scene whenever you like once you are live, so this is just the first thing viewers see.Your title and category
Only asked for a destination you set up by signing in with the platform, which today means Twitch. Your current title is already filled in, and the category is a row of game cover pictures you tap. Change nothing and your channel stays exactly as it was.
That is it, you are live. The button is now a red STOP, your connections are listed along the top, and the bottom right shows which scene is going out and how much video our servers are actually receiving.
19If your signal drops
Signal is not the same everywhere, and no app can invent it where there is none. What SSTL, the bonding we built ourselves, does is get the steadiest stream it can out of the connections you have, and move your video onto whichever one is holding up best as you walk.
If they all go at once, your channel does not end. We hold it open for ten minutes showing your Connection Lost scene. Walk back into signal and the app reconnects by itself and carries on, on the same stream, with nobody having to rejoin. The status at the top of your screen says Reconnecting the whole time.
If one particular spot always looks rough, it is nearly always the spot rather than the app. A slightly softer picture that never breaks up beats a sharp one that keeps cutting out, so drop the quality a little and keep walking. If you stream the same route often, you will learn where the dead patches are faster than any app can tell you.
20Ending your stream
Press STOP and the app asks which you meant, because there are two answers.
- Disconnect camera unhooks this phone but leaves your channel live, sitting on your Connection Lost scene. Use it to swap to another phone, put this one on charge, or get in a car without ending the broadcast.
- End stream ends it properly. Your channel goes offline and your viewers see the stream finish.
Cancel puts you back on the camera screen with nothing changed.
Ready to go live?
Get the app, work down this page once, and you will not need it again.
Get it on Android